Since my bachelorette party was 8 months in advance, I made sure I'd have PLENTY of opportunities to wear the fab sash. It's already looking a little tattered, but I love it just as much now as the day I opened it. I told you; I'm obsessed.
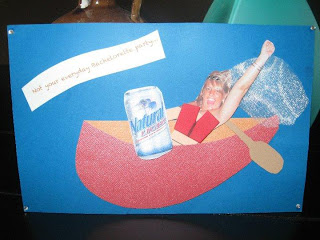
When the bachelorette party rolled around, I wanted to show my appreciation to the girls for all the hard work and planning that went into the bachelorette party float trip. They really went above and beyond in every aspect and I couldn't have been more appreciative! Tara, the craftsy bridesmaid, spent hours upon hours handmaking each invitation that went out. I personally think they'd fit in really nice at The Nelson Art Gallery--don't you think?
Instead of just getting us a campsite for all of us to set up tents, which mind you would have been a complete disaster as we were well into the celebration by the time we got down to the resort, they rented us this pimped out (in a rustic kind of way) cabin full of space for all of us girls. Freakin'. Blast.
To show my appreciation for all they had done I decided to make them their very own sashes. When I decided to take on this little project, it sounded a little easier than it actually was so I'd advise to plan accordingly. All in all, it took about 6 hours, over the span of a few days. When I set out on the journey of gathering supplies, I realized fairly quickly that Hobby Lobby needs desperate help in thier stocking department. I mean, who only keeps 1-2 rhinestone iron on letters of each letter of alphabet on hand. C'mon people! Needless to say this started a wild goose hunt which entailed my fiance driving all over town including Olathe, Shawnee, Overland Park and Leawood, hitting all the local craft stores until he was finally able to gather the rest of the rhinestone letters I needed to complete my project. I knew I was marrying him for a reason... :)
Once the letters were all gathered I was finally able to begin. I had my pink satin material which was super cheap at like $5 total. I had all the rhinestone letters which added up to about $40 total at $1.99 a piece. Then lastly, Jon picked me up some special glue to make sure the edges of the satin wouldn't fray when cut. The glue cost about $3-$4 bucks. So overall the project, depending on how large your bridal party is, will come to about $50. Not bad for such a personalized gift.
(Suggestion to save $$--I would sign up for the weekly emails from Hobby Lobby which will notify you when iron on letters are half off as that would save you a TON!)
After all supplies were gathered, I then cut each sash at the width I thought would most resemble the sash I was HOPING AND PRAYING to get myself. I eyeballed it--no need for rulers girls (unless you're obsessive compulsive.) The rest is pretty self explanatory--position the letters, grab and iron and Voila! Don't forget when all letters are ironed on to whip out that glue and glue down every edge of the sash to keep it from fraying.

Use thick towel when ironing letters
Iron On Rhinestone Letters
(Almost Completed) Bridesmaid Sash
Now, the last piece of the puzzle that I ALMOST forgot was an object necessary to hold the sash together so the girls could actually wear the pretty thangs. I ran back to the craft store and bought those Gi-Gan-To safety pins that look like they should be used to hold a diaper on. I then bought a pack of big 'ol rhinestones to snazz them up a bit. Got home, heated the glue gun and glued those puppies onto the safety pin. Effortless and a super cute final touch to bring the FAB sashes to life.
Simple. Easy. and SO SO Special.


No comments:
Post a Comment